Thursday, June 26, 2008
A Decidedly Low Tech Solution
It's no secret. I love my grippers. They're my little helpers once my hands leave the paper. They hold the paper flat and still during its wild ride. So what to do when the grippers must be moved far far away from the paper, like when scoring or perforating?
Rubber bands! One letterpress mentor actually recommended that I just slide the grippers out of the way and just use rubber bands all the time. I've found that while I like the rubber bands, I like the grippers better, so I only use the rubber bands when I need to.
Here I actually put two rubber bands as I was perforating so the paper would be held down on both sides of the perforation.
Sunday, April 6, 2008
My Black Ink
One of my clients marveled recently how beautiful my black is. She said it looked like rich calligrapher's ink.
So I'll let all of you in on my secret, which really isn't much of a secret at all. I find the black ink straight out of the can to be kind of flat and almost never use black straight out of the can. I add reflex blue, and quite a bit of it at that, to give it more body and to make it a richer jet black color.
Wednesday, April 2, 2008
I was going to post a snarky post...
I wasn't even going to even try to open up the discussion of whether using baby oil is "greener" than my diluted California Wash. I actually think the people who use vegetable oil and shortening win the green award for clean-up method. Last time I checked, baby oil is mineral oil with scent (a petroleum product), so one is still not getting around using a petroleum product to clean one's press by using baby oil. Mineral oil, mineral spirits, kerosene, California Wash -- they're all petroleum products. So by using baby oil, one isn't really getting away from petroleum products at all.
What I'm really worried about now that I've calmed down is that either (1) I have a gross misunderstanding of what the author means when she says that the whole press is oiled when she cleans with baby oil or (2) that press isn't being properly oiled. Because when I clean, I clean everything the ink gets on. Which is generally nowhere near the majority of the oiling holes on either of my presses.
So now that I've deleted most of the snarkiness out of my post, I'd just like to say that I'm worried about all of those letterpress newbies out there scouring all of our letterpress blogs. Please please please oil your presses properly. I know how expensive some of these presses are, and I would hate to see it freeze up on you.
And now I'm going to go oil my press.
Thursday, March 27, 2008
SPLAT!
Today when I came in, I noticed that my jar of metallic silver was turned over, lid off, on my poor carpeted floor. I can only imagine that I didn't put the lid back on tight, and when a cat (I blame Jezebel) knocked it off my desk, the lid came off and well, there was a big pool of metallic silver ink on my light beige carpet.
Now I know it's my own fault for putting these materials on carpet to begin with, but hey, the carpet was there already! Luckily I got it all out. Here's what I did. I first picked up what I could of the ink without spreading it even more. Then I used "Paint Clean Up" to get the bulk of the ink out of the carpet. With that done with it, I got out diluted California Wash, my steam cleaner (yes, I have a steam cleaner), and a bunch of carpet cleaning detergent. I filled up my steam cleaner with water and detergent, and, dousing the stain with the diluted California Wash, used the steam cleaner to clean the rest of the stain. Thank goodness!
Friday, March 7, 2008
Score!
For the longest time I've had a bunch of scoring rule and over 3 feet of creasing matrix for my press. I've honestly been a little afraid of the whole affair and so I hadn't done anything with it. My thought was to turn my tabletop press into a scoring press so I could just leave the creasing matrix channel on the tympan and score whenever I needed to. I never learned how to do this in my letterpress classes, and I was afraid of messing up perfectly good letterpress printed paper (and my press for that matter) trying this out.
My friend Carrie did it on her Vandercook, though, so I saw no reason why I had to be so chicken about the whole affair. I finally bit the bullet yesterday and locked my scoring rule and creasing matrix into the chase of my Pearl yesterday, lined up my card as I would as if I were going to print, and scored over 600 cards in about an hour. Amazing. Perfect folds. No more broken fibers ruining the fold and perfectly good cards. I feel really silly now to have waited so long to do this.
Here are the basic directions in case you want to do this on your own press:
1. Get a scoring rule and creasing matrix. Put the plastic creasing matrix on the scoring rule. Lock it into your chase and put it into your press. (I removed my rollers because there was really no point in keeping them on.)
2. Expose the adhesive backing on the creasing matrix. Run the press through one impression. The creasing matrix should now be attached to your tympan.
3. Remove the plastic lip that held your creasing matrix to your scoring rule. You should now have two raised plastic pieces that stick to your tympan and create a channel.
4. Align the paper as you normally would and run the press as you would as if you were printing the line (which, in essence, you are).
5. Voila! Perfectly scored paper!
Friday, October 5, 2007
Mixing Inks, Roller Bearers, and the Start of a New Year Card
I used the light blue today and it came out so beautifully I had to share. If you notice on the press, I'm using two roller bearers on either side of the form to keep the rollers at type-high. The roller bearers are type-high and serve to prevent roller slurs by keeping the rollers type-high before it hits the form. This saves majorly on the pains and sorrows of taping the rails to get the rollers type-high.
And here is the result -- the start of my New Year 2008 card:
I still need to mix my pinks and purples (I am using A LOT of colors) as well as a peach color. But I just needed to share this beautiful blue!
Enjoy!
Tuesday, August 7, 2007
Question on Ink Colors
Jen said...
Are the Rubine Red, Pantone Yellow, Process Blue, and Opaque White the only colors you use to mix with? I also have a PMS Guide and want to avoid spending $100 ordering 1lb cans of ink in all the colors so I'm trying to figure out which basic colors I can get by using to mix the PMS colors.
First, there's a great discussion on ink on Briarpress that you can look at that gives you tips on ink. I found it particularly helpful. You can order some lithographic ink to save some money, which tends to come in smaller cans and therefore cheaper. However, since it's oil based, it will dry in can, which, along with ease of cleaning, was a huge concern for me when I was deciding what to do in the beginning.
As you know from the post about ink, I started off with Rubine Red, Pantone Yellow, Process Blue, and Opaque White rubber based ink. I got black as samples from a bunch of places, and I also purchased metallic gold (from Accent) and silver (from Van Son) oil based ink because I have a thing for metallics. I chose these particular colors after thinking about what colors I would initially be using and going through the PMS color guide and seeing which red, yellow, and blue matched my needs best. I still use these colors extensively, but I've found that I have needed other colors as well.
Luckily, I have a friend who is also starting her own letterpress studio and her initial needs were Red Pepper (PMS 199), Pantone Yellow, Pantone Green, and Reflex Blue. She also decided to get a mixed Chocolate Brown (a must in this design time). Then we met and traded inks. I figured out later that I really didn't need Red Pepper from her since it's based on Rubine Red, but I've used that as a basis for Joie Studio's pink (added white) and red (added black) business card colors since it's easier than starting from scratch. I also mixed the Pantone Green with the metallic silver for the blue-green coasters I did recently. I also just stole a little bit of Warm Red and Pantone Purple from her.
Next on my list to acquire will probably be Warm Red and PMS 8560, but I'm waiting for that design project to start before buying.
My advice to you is to look through the book and decide what colors you absolutely need, then buy more colors as you go along to spread out the cost of ink. At the end of the day, $20-$25 every now and then isn't so bad. My initial purchase of those 4 pantone colors plus the metallics probably set me back well over $100, so it's not cheap, but I figure that the rubber-based inks will last me for a long time, as opposed to the 1/4lb cans of oil based inks that may dry up on me before I get to use a significant amount. In letterpress, a little ink goes a long way.
Wednesday, August 1, 2007
Questions on Custom Plates for Letterpress
Why did you decide to use plates instead of handsetting the type? I was given some type when I bought my Pilot press but I am thinking of trying out the plates. It definitely seems like the easier way to get more font choices. Plus no dropped trays. (my biggest nightmare/fear)
What kind of die cuts are those? They don't look photopolymer. Do you have good success with them?
To answer these questions, first, let me address handsetting type. I don't generally handset type because, first and foremost, I don't have a lot of room to keep a wide variety of type in different sizes and fonts. Secondly, it costs a lot of money to amass the collection of type that I would want to do the things I do right now. Third, it would take forever to set and reset type on the whim of my clients. Fourth, it's a lot easier to have a custom plate made. Fifth, there are some designs that I use and that I create that are not available, so I need to make custom plates for those. Sixth, setting type is a labor of love, and while I like to do it, I would do it only for personal projects because of the time and effort it takes to handset type.
Platemaking is fairly inexpensive, although in the long run you do pay for the convenience. With type, it's a one time charge per font face and size. But I get exactly the layout and type I want, I can send electronic proofs for clients to look at and revise before I get started, and once it's done, I have the option of giving the plates to my clients for safekeeping in case I run out of room.
I don't use photopolymer plates. When I first looked into them, I didn't quite understand them (still don't, really, although I hear they are easy) and the base and photopolymer plates seemed more expensive than what I was already using. Although photopolymer plates are easier to store and you can cut them up and reset them in any number of combinations, I have heard that the impressions aren't as good as with metal plates and they degrade much faster than their metal counterparts.
I use 16 gauge magnesium plates mounted type-high on wood from Owosso Graphic Arts (see their link in the sidebar on the right). They have a same day turnaround, and through Priority Mail, I usually get the plates 3 or 4 days after I send them the digital file. I've been very happy with Owosso's service and pricing, and, as the saying goes, if it ain't broke, don't fix it!
Friday, July 20, 2007
Question About Paper Cutting
Anonymous said...
Your blog has been so helpful to me. Because of this blog and your helpful examples I have finally decided to take the plunge and buy a press of my very own. I was wondering do you cut your paper or do you have it cut for you? If you do your own, what do you use to cut it? Thanks!
Monday, July 16, 2007
First off, thank you for the feedback, and I'm glad that you find my blog so helpful! I do hope you find a class or a workshop near you so you get some instruction on letterpress before plunging in!
On to paper cutting. So this is not quite as simple of an answer as you would think. I try to take the lazy approach and buy pre-cut paper and cardstock, like the Fabriano, Arturo, and Paper Source cards. But every now and then, it's necessary to get the paper cut down to size. When it's a professional job that I want to have exact cuts on, I take it to a professional place. Kelly Paper charges a flat charge of $15 to cut parent sheets down to whatever size(s) you want. But that means you have to buy the paper from Kelly Paper. Kinko's charges $1.49 or something per cut per 100 sheets, and so far, they've been the best and cheapest to work with. But every Kinko's is different, so tread carefully. Do a test cut order first. It'll be worth the $5 to make sure that they can actually cut and follow directions. I had half of a ream of 220lb cardstock ruined by Office Max's Impress, and I guarantee I will NEVER be going back there to cut paper.
For smaller cutting jobs or jobs where I don't need exact precision, I use my 12" x 12" paper trimmer, which is a guillotine style trimmer. For the larger sheets, I go to Kinko's, where they have a large rotary trimmer set out for customers to use, or to my local art center/school, where they generally have larger paper trimmers set out for students to use.
I hope this helps!
Wednesday, June 6, 2007
Cleaning Up Ink on the Cat...
My cleaning setup is as toxic-low as I can make it. I use canola oil to clean ink off of the press and equipment, and I follow up with just a bit of California Wash to take off the oil residue. Every now and then I use Putz Pomade to condition my rubber rollers and I always use the California Wash on the plates, but other than that, it's mostly just cooking oil. Honestly, I mostly use the California Wash on my hands to get off ink blotches that don't easily come off with soap or oil.
But how do you get rubber based ink off of a cat? That is NOT something that is generally covered by letterpress discussion lists, blogs, or in class, and I wasn't about to use California Wash or mineral spirits on the cat. Neither is "how to get rubber-based ink off our pet's fur" a general resource on any vet website. One option that I offered up immediately was to shave her, but that didn't sit well with my husband. So here's the what we did to clean off our poor cat:
At first, we thought the only part of dear Jezebel that got inked was her front paw, so we doused it with canola oil and rubbed it in good. Then we followed it up with some good old fashioned Dawn dishwashing soap (I figured, if it is good enough to clean crude oil off of wild animals, it's good enough to take off diluted rubber based ink and canola oil off of my cat). While we were rubbing the Dawn in, Joel asked where all the ink stains on my pants were coming from. Jezebel then got a thorough rubdown while we looked for the source. Now, she's a black cat and I was using dark purple ink, so it wasn't very apparent where exactly the ink was. We figured out that it was somewhere on her tail and the rubbing in of canola oil and then Dawn continued on poor Jezebel's tail. After we finished with the oil and Dawn, Jezebel got dunked into a bathroom sink filled with warm water. We did this twice, and the purple ink with this treatment came right off once we figured out where exactly it was. Jezebel got her first bath ever. She's well and feisty, and she won't let us anywhere near her scraggly tail to brush it out.
Monday, May 14, 2007
Inks: Buying, Mixing, and Storing

After much thought, discussion, and research, I decided to go with rubber-based ink as the primary type of ink for my letterpress studio, mainly because it would take forever for me to finish a one-pound can and rubber-based ink is less likely to dry out in the can. I have stocked up on a bunch of Pantone bases and have armed myself with Pantone color guides to make custom mixes for client projects. I bought Van Son Rubber Base Plus in Rubine Red, Pantone Yellow, Process Blue, and Opaque White. I received a bunch of oil-based black as samples, so I will wait until I need more. (Of course, metallic colors only come in oil-based ink, so I got a can of metallic gold oil-based letterpress ink from Accent Ink as well.)
There was a great discussion on Briarpress on inks, and one posting had a great technique at measuring out the different colors for mixing. Jason used "dabs" to count out the different color parts. I used this technique in mixing the more complex custom mixes, although I do have to say that I did a fair amount of "eyeballing" as well.
I mixed the colors for three of my current projects, below. The first row is for a wedding invitation, the second is for a set of business cards for my client, and the third is for Joie Studio's business cards.

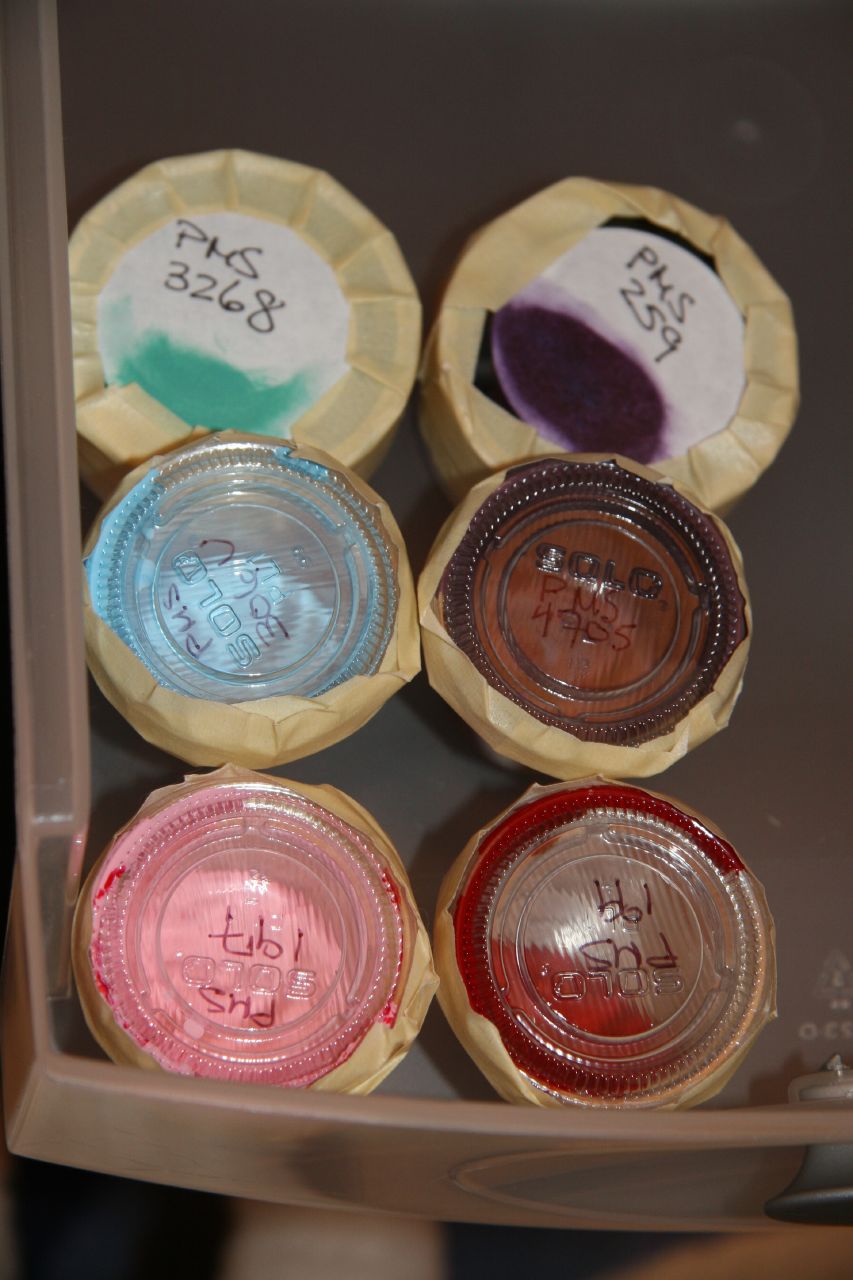
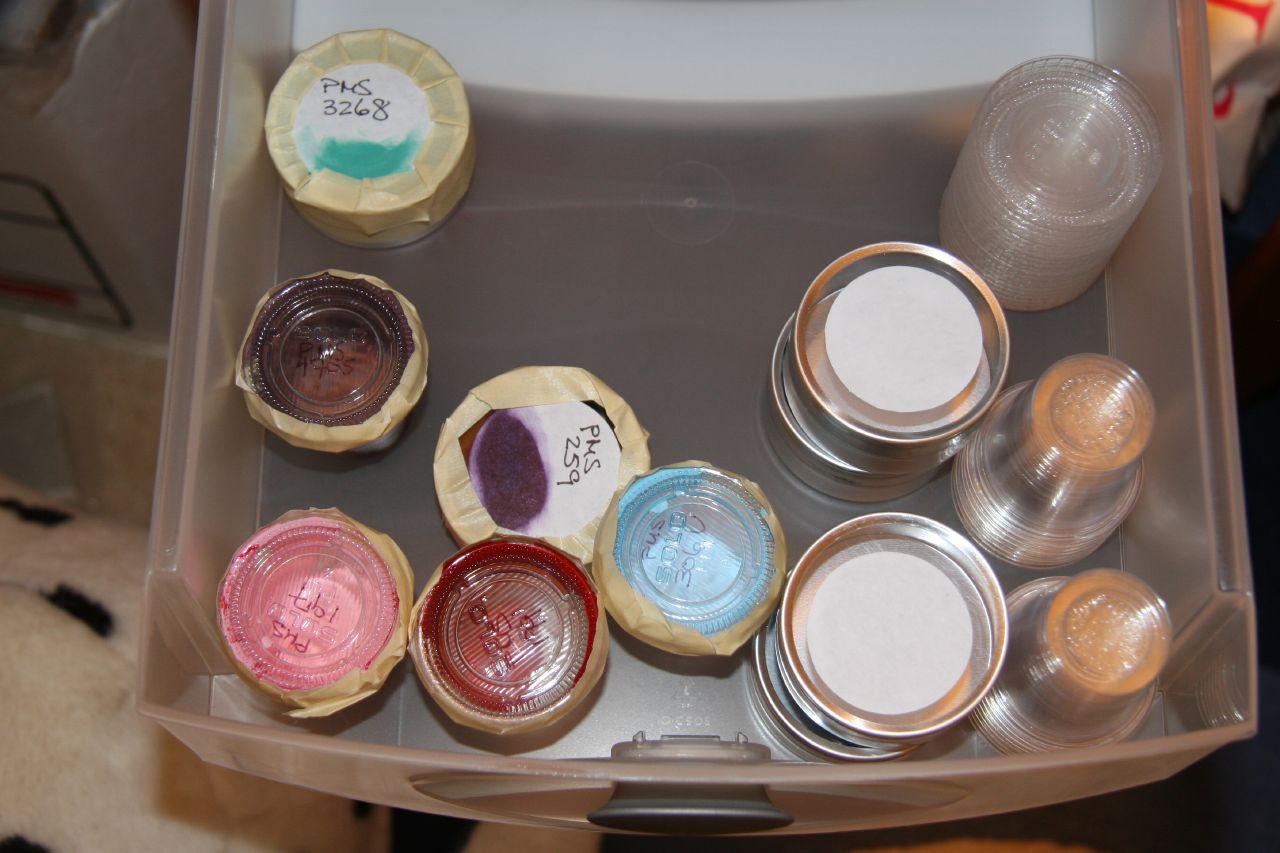
Finding containers to store the custom mixes has been an interesting scavenger hunt. Dave Celani talks about using 4 oz cans and 5 oz tubes to store ink, but the amount I'm making is significantly smaller than 4 or 5 ounces. At letterpress class, we use old film canisters, but as I've completely switched to a digital photography setup here, that doesn't quite work out. I did find at a local restaurant supply store and a local craft store (Michael's!) some good storage options. For small amounts of ink that I want to save, I bought those little plastic containers and caps that to-go places put sauces in (about $5 for over 100 containers). These hold, according to the bag, 1.25 oz. I use a thin-tipped Sharpie to write the Pantone color number on the lid. I also bought wedding favor tins from my local craft store (Michael's, though I've seen them everywhere, including Target in the wedding section), which hold about twice as much as those little plastic containers. The wedding favor tins (about $20 for 30) have a clear top and also come with labels. I used the labels to smear some of the ink on and to write the Pantone number on. I tape these containers up so as to keep air out as much as possible.

I am going to trade ink with a friend of mine who is also setting up a letterpress studio. We've bought some 4 oz cans and we luckily haven't had too much overlap yet on what colors we've bought because it would take either of us years to finish one of those cans of color!
Friday, May 4, 2007
Having Plates Made...
1. On a two color vector image, you can leave the entire file intact and they will be able to separate out the two colors and make a different die for each color.
2. This I learned from one of my classmates in my letterpress class. You can also save money on plates by laying out all the different plates you want made into a single file and submitting it as a single plate that needs to be cut into different pieces (the cut charge on wood-mounted magnesium is 60 cents per cut). I'm going to do a more detailed post on this later when I have more time. Basically, I saved about 40% by submitting four plates as one plate that needed to be cut instead of submitting them as four different plates.
Call Owosso directly (800-444-5552) if you have any questions about the best way to submit your artwork. They are super helpful and responsive, especially over the phone.
Saturday, April 21, 2007
Learning How to Letterpress (aka, Step 0)
TAKE A CLASS
In Los Angeles, there are a couple places that I know of to take a formal class on letterpress. The one I that I've been taking is at the Armory Center for the Arts in Pasadena, California. I know that Art Center College of Design (look under Public Programs) also has a class, as well as Otis College of Art and Design (also under Public Programs). I seem to remember that LA Book Arts Center had a workshop once, but please don't quote me on that. (I will tell you, just by looking, that the Armory's class is WAY cheaper than Art Center or Otis.)
Outside of Los Angeles, I have absolutely no clue. Briar Press has a "Workshops and Events" Section you can check out, along with a section in their Yellow Pages for "Schools/Classes." One word of advice I'd like to offer you: many letterpress experts have divergent opinions on what is good and what is not. Very divergent. To the point of being disparaging to each other. Take all opinions with a grain of salt, do your own research, and decide for yourself what you like and what you don't. There are some that will only print with one type of ink or another, will insist that there's only one good way to clean a press, have a clear preference for photopolymer plates or metal plates, etc., etc., etc.
RESEARCH RESEARCH RESEARCH
Aside from taking a class (or finding a local printer to show you the ropes as Erin suggests in her blog post linked above), you can read up on letterpress online and in books. Here is a list of annotated online resources to help you get started:
- Introduction to Letterpress Printing by David Rose
This article was invaluable to me when I was first starting out. It explains the whole process, and the article goes on to list more resources for you to learn more. - Letterpress FAQ
This is the FAQ of the Letpress list. It provides great answers to questions on starting letterpress, different presses, setting type, paper and supplies, and more! - Secrets of a Kelseyman by Jack Gifford
While the title makes it sound like this article is made specifically for the Kelsey, it's actually quite relevant for all tabletop presses, giving fix suggestions to common problems. - Basic Letterpress Tools
This primer gives you the basics on what you will need to hand-set type. - Things Within Every Letterpress Print Shop
John Barrett gives a good list (in shopping list fashion) of what you need in order to start your own letterpress studio. - First Press Suggestions by John Horn
This is an invaluable article listing the pros and cons of different tabletop presses, if you're looking to get one.
In addition, General Printing, as mentioned in David Rose's article, seems to be the definitive book in learning how to letterpress. It became so definitive that it's been republished and is available for purchase online. Additionally, I've heard that, though I haven't seen it so my word is no good here, the DVD/VHS called Ten Presses and How They Work is a great resource.
ASK LOTS OF QUESTIONS
There is a discussion forum on Briar Press, a number of letterpress listservs (see David Rose's article for the list), and letterpress groups on Flickr, Flappr, and probably any social networking site. Letterpress people are very helpful and friendly. I will say this again, though, some people have very divergent opinions on what is good and what is not. You need to research for yourself and figure out what sounds best to you.
LOOK BEFORE YOU LEAP
Letterpress is an expensive hobby and habit. I've invested thousands of dollars into classes, my press, my equipment, plates, ink, and paper. My greatest suggestion to anyone looking to get started is to take a class or hound another printer until they let you try it out. You might find that while you like the end product, you don't care for the more tedious aspects of letterpress. Or you might find that you absolutely love it. I think it was worth every penny for me to take the classes and to get firsthand experience in setting type, using different machines, and watching and getting inspiration from others in class.
Happy letterpressing!