Showing posts with label Equipment/Supplies. Show all posts

Thursday, October 21, 2010

Newest Member of Joie Studio's Printshop

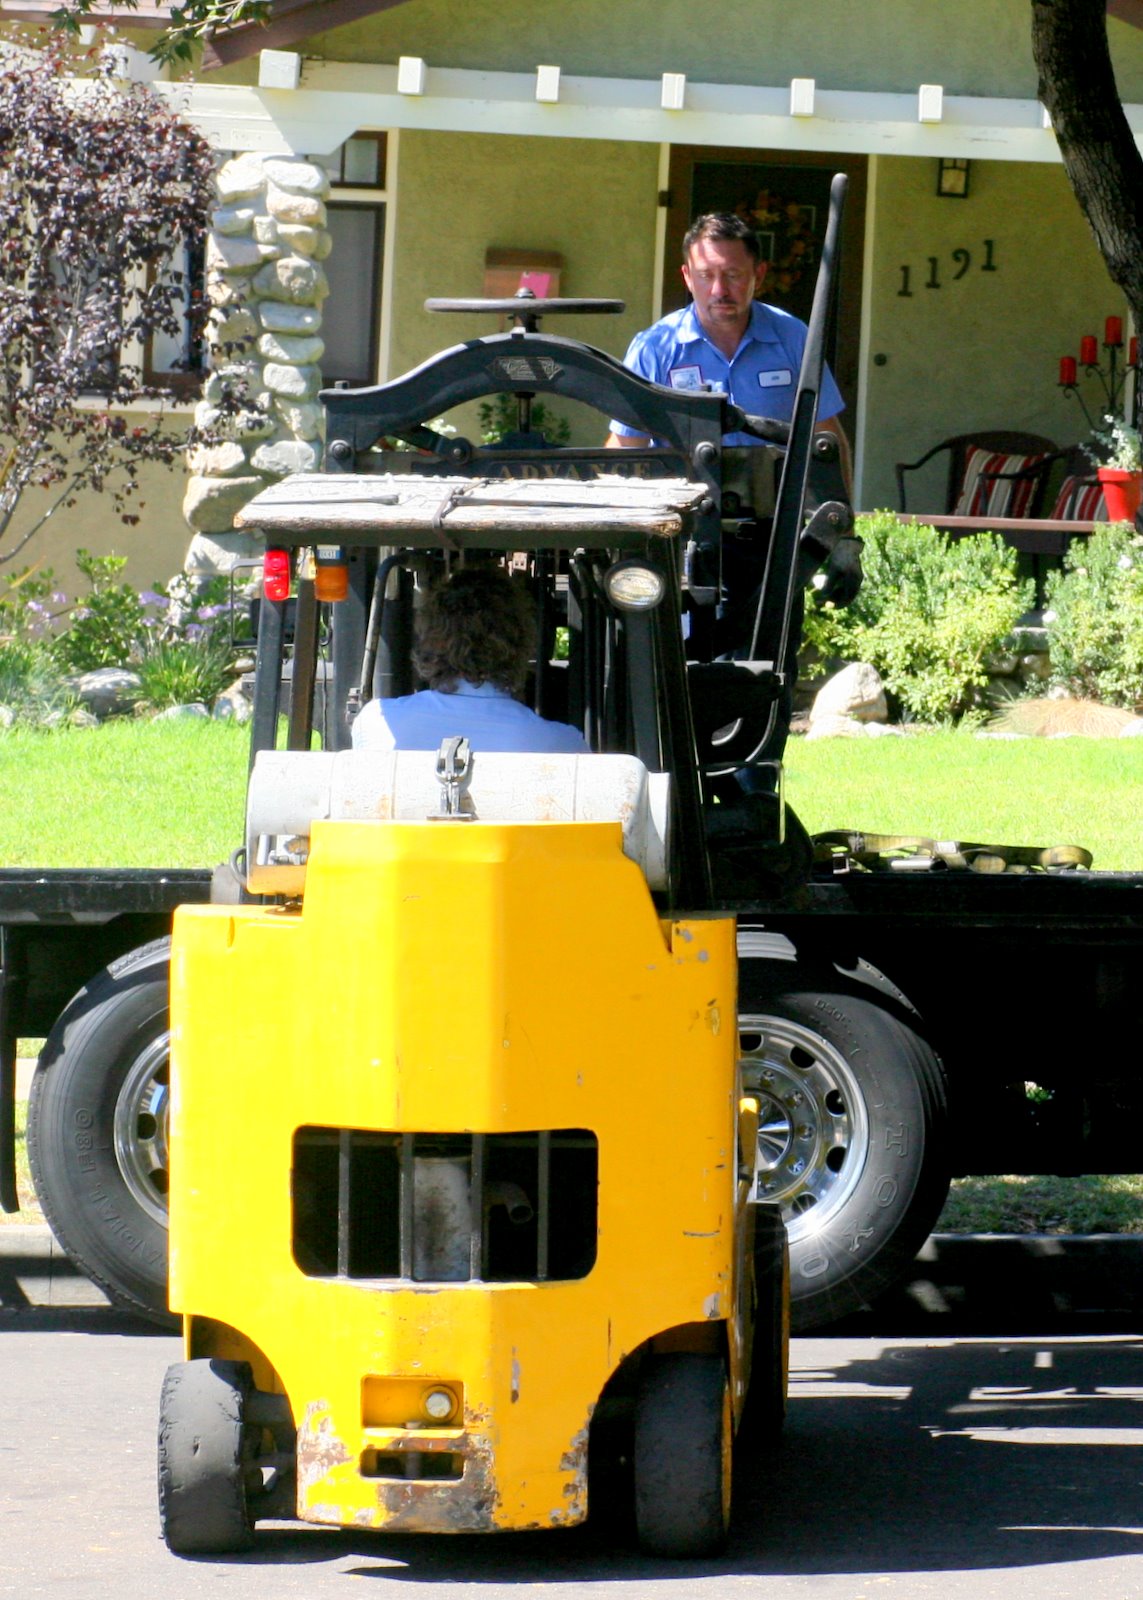
The newest member to our printshop isn't a press at all - it's a cutter! A gorgeous, 30" cutter - a Challenge Advance to be exact. I have had paper cutter drama after paper cutter drama looking for a cutter for the shop, and it's taken me awhile to find a good paper cutter in my price range. And this one is it. It has original gold leaf design on it and everything. It may seem like a bit of overkill to call our friendly neighborhood press mover for it, but all my friends have been twice bitten, four times shy when it comes to moving my press equipment, and it really isn't that much cheaper to move it yourself anyway. Here she is on the truck waiting to be unloaded:
Jim & Marco doing their thing:
I have yet to take close-up pics of the cutter, but I'll be sure to share with you as soon as I do!

Monday, July 12, 2010

How Rubber Rollers Are Made...

Happy Monday! I just wanted to share a video I shot last Thursday. It's a short video, but I was utterly fascinated when I visited Adrian and Jane at Ramco at the grinding down of my very own rollers and had to get some video of this grinder in action -- here's a short clip of it --

The rollers that Adrian made for my Golding Pearl Improved were perfect and were made to Golding's original specifications (I checked with the Golding experts out there to be sure). But my press is 101 years old, and over the course of 101 years, the rails wear down. You can either tape up the rails, tape the roller trucks, use roller bearers, or any combination thereof. OR you can get your rollers ground down to exactly the right size. So for years, I've been using bearers without incident.

Then a little over a year ago, I decided to try out photopolymer plates on the Pearl. That was a miserable business -- the masking tape was on the rails, the trucks, everywhere while the bearers were moved closer to the base. They are NOT kidding when they say that your rollers need to be set exactly right. Photopolymer is not as forgiving of flaws as the other types of plates. Photopolymer is a harsh taskmaster, wanting everything (and I mean EVERYTHING) set perfectly before it will pull anywhere near the same kind of print on the platen press. Given, I was probably setting myself up for failure since I didn't have the deep relief base, but photopolymer was calling me out things that metal plates let slide. The Vandercook, being a precision press, had no problems with the photopolymer. But the Pearl. Krikey. I swore that there was no way I was going to do photopolymer on the Pearl again (the Vandercook is another story entirely).

But the whole experience made me think that instead of doing this whole big song and dance that I should actually just take the rollers back to Adrian and have him grind it down a little bit more no matter what and have the rollers be just right for my press. The metal plates would still print with smaller rollers. Then maybe, just maybe, I would try the photopolymer on the Pearl again.

I finally carved out some time to go over to San Dimas to visit with Adrian at Ramco to get this done (mostly because I had a bunch of business to attend to in nearby Claremont, the home of my college alma mater). Adrian was his usual helpful self, grinding down the rollers while I waited. I found myself fascinated with the vintage machine he was using. So now my rollers' radii are 1/8" smaller than before. Hot stuff! I'll tell you how it goes when I ink up again! AND I need to share the new studio swag I scored from a retired printer. I also have to go back to Claremont to grab some pics to share with you the gorgeous town I went to college in.

Thursday, May 13, 2010

The New Kid on the Block


Introducing the newest member of Joie Studio...the youngest press here, a Heidelberg Windmill. I still have to get a press mechanic out to give it a tune up and help me wire it up, but I'm very very excited to have the Windmill here.

Wednesday, May 12, 2010

Hello Ink!


It's busy in the print room right now. I've been mixing up new gorgeous colors for some custom letterpress jobs and some new items that I've been designing. Here's some picks as sneak peeks at some colors that have been on the press lately. I mix the ink to match envelopes by hand (or whatever swatch my clients give me). It's just a bit of love that goes into every print run that I do. And a peek at my ink shelf, filled with Van Son and Accent Ink cans. Now I gotta get back to work!

Wednesday, September 17, 2008

Our Newest Friends...and Our Newest Addition!

I'm sorry I haven't posted lately. My world has been just one hot mess! But I think we're almost back on track.

First, and most exciting, is Joie Studio's newest friends Fugu Fugu Press. I met Ken and Shino back in May at the National Stationery Show and loved talking with them. They are also based in Pasadena, which made it exciting. When I was looking for space for Joie Studio's newest addition, I approached Ken and Shino, and they were so nice as to let me plop our newest acquisition in their shop:

It's a Vandercook 4! Notice the cabinet doors in front? It makes it an "Old Style" Vandercook 4. Later models have open shelves and drawers on the bottom. An interesting thing about this press is that it is a factory rebuild, as evidenced by the "99-" in the serial number.

More glamour shots of the Vandercook:


Notice the delivery tray in the bottom left corner of the last picture? I need to go get some nuts to secure the delivery tray onto the Vandercook. Did you see Fugu Fugu's cards in the background?

Here are some pictures of the Fugu Fugu shop:


There's an awesome vintage gas station outside the shop, and in the shop, Fugu Fugu prints everthing on a black ball Heidelberg and a 12 x 18 C&P. More pics of Fugu Fugu Press can be found on their website.

Saturday, July 12, 2008

My Golding Official #4 Needs a Good Home

So as much as I'd love to keep my Golding Official #4, space as always is at a premium in my studio and the Golding Official just doesn't get as much use as it could. I'm sure someone looking for a press would love to have it, and I think it'll make a great first press for anyone out there. To that end, I've decided to take offers for my Golding Official, complete with a starter kit. Here's what I'm offering:

- 1919 Golding Official #4, complete with 6" x 9" chase and rubber rollers - recently printed wedding invitations and coasters
- 4-6 quoins and one quoin key
- Some wood furniture and reglets
- 1 lb of soy-based black ink
- Some sets of type and printer's cuts to get you started
- 1 ream of Crane's Lettra 110lb (125 sheets)

I'm putting it on the blog first, but I will also put it on Briarpress once I figure out exactly what type I'm going to send out along with it. My thought is some Century Schoolbook and maybe Copperplate, but I'm unsure at this point. Local pickup is preferred I won't crate the Official for shipment and it's worth too much to just put in a cardboard box and hope for the best. But if you can figure out shipping, then I'll be more than happy to accommodate.

You can send your bids to me at tina[at]joiestudio.com.

Thursday, April 24, 2008

Destashing Crane's Lettra, Coasters, Envelopes

So I buy paper specifically for custom jobs with a certain amount of overage just in case. Sometimes, I need to buy a specific bulk quantity and have leftover paper. Lately, my paper supply has gotten a little out of control, so I've decided to put them on sale. My largest supply is of course Crane's Lettra, which is professionally cut down by my paper broker with a nice big paper cutting machine. I've got a bunch, and by a bunch I mean a couple boxes, of A7 (4.875x7) flat cards. Also, I stocked up on coasters thinking I was going to do a project out of them, but I just haven't had the time and I need the space the boxes (yes, again, boxes) of coasters are taking up. The same goes for envelopes. I have lots and lots of envelopes around the studio.

Here is the link to my overstock shop: http://www.mysticbottle.com/shop/

I'm going through my supply slowly, so if there's a certain size or color you're looking for, shoot me an email and I'll see if I've got what you're looking for.

Tuesday, April 22, 2008

Happy Earth Day!

You might have noticed that I've been labeling some of my posts "eco-savvy." Eco-savvy is not just about choosing something because it sounds environmentally friendly, like soy inks and baby oil. Being savvy is about being smart and making informed, educated choices. On Earth Day, I wanted to share with you all the ways Joie Studio is being environmentally responsible. I call it eco-savvy letterpress!

Environmentally Friendly Papers
Joie Studio isn’t going green – we’ve always been green! Joie Studio is proud that since our inception, the majority of our ready-made and custom letterpress has been printed on 100% cotton paper and cardstock. Cotton is a tree-free, renewable resource. The paper we use is made from cotton linters and rag from cotton ginning waste and textile cuttings. This recovered cotton is saved from landfills, and made into our ultra-luxurious, ultra-thick letterpress papers.

We carefully choose our other papers to make sure that our eco-savvy standard and our letterpress quality remain high. Most of our complementary papers are made with recycled paper. One paper mill we work with not only makes all their paper using 100% green hydroelectricity, they supply their surplus energy to their local energy company!

Reducing Waste
Joie Studio believes that being eco-savvy doesn’t stop at choosing environmentally-friendly paper. We have carefully chosen inks and solvents that produce the least amount of waste. It does Earth no good if by changing to materials that sound eco-friendlier, we produce more trash. So we have chosen the best letterpress papers, the least wasteful letterpress inks, and the best yet eco-friendly solvents to make our letterpress products so beautiful, our clients and customers won’t want to throw them away!

Eco-Chic Alternatives
Joie Studio recently introduced an eco-chic alternative to paper: wood! In April 2008, we started offering custom wood letterpress wedding invitations. Made from wood veneer, these small pieces of wood are cut from wood grown in private lots, are produced using less electricity and chemicals than regular paper, produce no VOC's in the process, and are recyclable!

Wedding invitation and special event clients looking to cut down on the amount of paper they are sending out can also employ Joie Studio to build custom event websites instead of sending out multiple enclosure cards. Custom-built event websites give event guests more information than a little card ever could, and they are a savvy way of reducing the amount of paper sent out.

Looking to the Future
In late April, Joie Studio will introduce our Nature’s Kiss letterpress collection, a collection inspired by nature with materials that are friendly to nature. The basis for the collection will be the wood invitations and 100% cotton or 100% recycled papers.

In the testing stages is plantable seed paper, which is 100% cotton and 100% recycled paper with seeds mixed into the paper pulp. We’ve got our fingers crossed that these papers are good enough to offer our clients and customers!

Friday, April 18, 2008

Font-astic!

I've been wanting some sans-serif type for awhile to add a little bit of versatility to what I can handset here at the studio. I really wanted something like Century Gothic to complement my Century Schoolbook collection, but Century Gothic is a modern digital font that was made as an homage to Twentieth Century. (How's that for font geekiness? So much you can learn by Googling something.) Twentieth Century is okay, but not my favorite sans serif font.

Carrie pointed me towards Sans Serif Light, and I immediately fell in love with it. In desperate "I NEED IT NOW" love. So a bunch of emails to a bunch of people later, I am the proud new owner of 24pt Sans Serif Light, completely new and uninked. This font has not seen the light of day since it was cast in the late 20's or early 30's, which makes it even cooler to know that I was the first one to let the font see light since it was cast 80 years ago.

And here is what the font looks like:

I also found 12pt and it should be coming any day now, so I'm very excited to have these two fonts!
Posted by Picasa

Thursday, April 10, 2008

eBay Goodie!

So every now and then, I go a little crazy on eBay. But luckily, this time around I actually found something I've been needing for my printroom:

Yay! Everywhere I've inquired I've gotten not so fun prices, so this one on eBay was a "deal," even if I'm paying more for shipping than the item itself. I imagine this didn't go for very much because there's barely any furniture on it. I don't care. I already have furniture and I need a more orderly place to put them than in two different drawers on opposing sides of the room.

I have grand dreams of sanding this down and painting it hot pink. Probably what will actually happen is that I will wipe it down and put it in between my olive green type cabinet and my pretty Pearl press. I can't wait to get it!!!

Tuesday, April 8, 2008

Boxcar Base or Honeycomb Base?

I've been using the standard custom magnesium on wood, but now that I'm getting into larger patterns with my designs, I've been noticing unevenness in print that can only be due to the wood underneath. Problematic, though one of my letterpress friends in going through my recent work commented that the unevenness made the pattern look cooler. But that was only after I concocted some insane makeready to make it print the way it did.

So eventually I will need to make a decision on whether I want to go towards photopolymer and grab myself a photopolymer base or stick with metal plates and go for a honeycomb base.

What's fun about photopolymer is that with a Boxcar base, you're pretty much just using stickers on the base. Magnetic bases are probably the better option as they're so much more heavy-duty but they are so outrageously out of my price range. What's not so fun about photopolymer, besides the fact that those little sticky pieces of plastic are more expensive than my metal on wood setup right now, is that you're basically using stickers on the base. Magnesium to me is already flimsy enough as is, and I can't imagine hard plastic to be as strong as metal. There are those that say that magnesium makes a better print -- especially with text, and after seeing some photopolymer printing out there, I have to tend to agree.

Now with the honeycomb base, I get to keep using magnesium or even copper plates, but the difference is that I would be buying the plates unmounted and mount them onto the honeycomb base, which is metal and consistent and good. The downside is I'd need a thicker metal plate to mount onto a honeycomb base, so that the cost is higher than the old metal on wood method as wood is cheap and metal is not.

Either way, both options cost more, and I'm really uncertain of what it will do to my overall print quality.

I really really wish the letterpress classes that I took and the thousands of dollars I put into the classes would have let me experience these different methods of printing. I mean, sure, I can set type pretty well, I know how to set the chase properly (though I almost never do unless I'm using hand-set type), and I can mix my own colors, but these are the days when it's frustrating to me because I feel like I'm making a blind choice based on what I've read and other people's experiences when, really, I would have liked to experience ALL these different methods and choose for myself what I like best.

Hmm, if only there were an equipment rental program where I could try out all these bases before making a final decision...

Thursday, April 3, 2008

A peek into my R&D


In what little time my clients haven't taken up (hey, I'm not complaining!), I tested out printing on wood on the press.

I had sworn up and down that I'd seen other letterpress companies letterpress wood paper, but since these thin slices of wood are fairly pricey, I decided to go get some from my friendly not-in-the-neighborhood paper company way out yonder on the ever-so-trendy west side of LA to test before doing some sort of huge bulk order.

The woods from top to bottom are aspen, walnut, red cedar, cherry, and maple. Not all of these woods are going to stay in my repertoire because I found that some woods didn't print as well as others, and unless I can find a way to mitigate the problems, I won't use them. The price of wood paper is something like 10 times the price of my normal already luxurious cardstock, so I'm going to test these pieces some more with different inks and different designs to see what works and what doesn't.

I am so in love, though, with the result of this experiment. It gets me so excited thinking of the pretty little somethings I have dreamed up for this wood.
Posted by Picasa

Thursday, March 27, 2008

Ink Vendor Question

I saw this question recently:

Hi Tina,I just got a Kelsey 5x8 from Craig at Don Black's Linecasting in Toronto, Canada. Unfortunately, the starter kit did not come with any ink or a cleaner. I've been reading and enjoying your blog for a while now, and was wonder if you can share with me where you purchase your inks and what you recommend to purchase for a first ink colour. Also, if there is a place I can order some califronia wash. Thank you (^_^)

I get my ink supplies from a couple places. Online, I like US Litho Supply, although I generally don't buy enough to warrant placing an online order. I got my initial supply of Van Son rubber based ink, a gallon of California Wash, and a couple other supplies from there. If I need one color or one or two supplies quickly, I stop by my friendly neighborhood Kelly Paper or even friendlier Keldon Paper. My absolute favorite place to get ink, however, is my local ink supplier Accent Ink. They only do oil based inks, but I get all my metallic inks from Accent, as well as my clients' special order custom inks.

As for first ink color, it might sound boring, but black is always a good place to start. Hope that helps!

Friday, January 4, 2008

Inks, Paper, and Eco-Friendliness

My friend Carrie and I were talking today about the current trendy thing to do is to ride the "green" wave by using recycled papers and using soy inks in letterpress. This takes me back to when I was first setting up shop and I was trying to decide which inks to use on my press.

Soy-based inks have such a lovely, environmentally-friendly sound to it. But if you look into it, the formulations aren't total soy formulations. Usually soy-based inks are about 20% soy, 80% everything you would normally find in regular rubber-based or oil-based ink. Soy-based inks use the same exact pigments as rubber-based or oil-based inks, and not many pigments are very environmentally friendly. Soy-based inks also dry in can from what I've read, so if a printer doesn't use their ink often, the ink will eventually dry in can, creating a top layer dry "skin" that needs to be disposed of to get to the good ink underneath.

I ultimately decided on rubber-based ink because rubber-based inks don't dry in cans, creating less waste. In letterpress, you use just a little dab, hardly any ink at all, and so one of those one pound cans of ink will last YEARS.

As for paper, Joie Studio does offer recycled cardstock and envelopes in addition to the 100% cotton stock that I use. My preference is for the cotton stock, but I do try to pair the stock with envelopes made from recycled paper whenever the design will allow. Clients need only ask for recycled stock on custom orders. More important to me is to limit my waste and spoilage by offering only papers that I know will print well.

So while the printing here at Joie Studio isn't powered by wind energy and hasn't gone totally "green," you can rest assured that my choices have minimizing waste as a top priority, which is, to the very least, eco-minded.

Friday, October 5, 2007

Mixing Inks, Roller Bearers, and the Start of a New Year Card

Friends that know me know that I am notorious for spilling things on myself, so it's no shocker than whenever I work with ink, I tend to get it all over my hands, arms, and sometimes, to my great dismay, my clothes. So this past weekend, I decided just to get my hands dirty only once and mix all the different greens and blues that I will be using in the coming weeks. These are (hopefully) all the greens and blues I will need to mix to finish my holiday collection. All these greens and blues were mixed using opaque white, Pantone yellow, Pantone green, and process blue.


I used the light blue today and it came out so beautifully I had to share. If you notice on the press, I'm using two roller bearers on either side of the form to keep the rollers at type-high. The roller bearers are type-high and serve to prevent roller slurs by keeping the rollers type-high before it hits the form. This saves majorly on the pains and sorrows of taping the rails to get the rollers type-high.

And here is the result -- the start of my New Year 2008 card:

I still need to mix my pinks and purples (I am using A LOT of colors) as well as a peach color. But I just needed to share this beautiful blue!

Enjoy!
Posted by Picasa

Tuesday, September 25, 2007

First Run of the Golding Pearl!

Using our Flip Video, I recorded about 15 seconds of the Golding Pearl in action today. I have to say, it moves beautifully! I'm so impressed by how well this little 400 lb. press works. I'll get my husband to record me actually feeding the press at a later date. Enjoy!


Sunday, September 16, 2007

Rounding Corners

One of my upcoming designs calls for rounded corners. In fact, most of my flat designs, including the bookmarks that I've designed, calls for rounded corners (it's the trend!). My friend Michelle has a Lassco CR-20 corner rounder, which works well, but she's got a 1/2" die and I wanted 1/4" rounded corners. For the cost of another die for the Lassco corner rounder, I got this corner rounder:


It's the Akiles Diamond 1 Corner Rounder. I'm pretty happy with it thus far. Mostly I got it because the different dies are WAY cheaper than the Lassco model.
Posted by Picasa

Thursday, September 6, 2007

Fun with Rollers!

You know, I've had a fairly easy time with my presses thus far (I can't believe I'm in the multiple!), because most of the "fixing up" that I have needed to do have centered around recovering the rollers and cleaning off the grime. I need to get a spring and replace a belt on the motor of the Golding Pearl, but even without those fixes, the press runs without much issue.

The rollers will generally be one thing that will always need to be dealt with when buying these kinds of presses. Generally rollers over the course of time degrade, shrink, swell, get warped, melt off, or something. I'm glad I found Adrian and Jane at Ramco Roller in San Dimas, who not only have great prices for rubber rollers, but have pretty fast turnaround and are genuinely nice people. I just brought them the old crusty composition rollers and the roller trucks from the Pearl, and Adrian said that he'd get them back to me early next week. The trucks are needed because Adrian makes the rollers based on the size of the trucks. This is especially important if you don't have the original specifications on what diameter the rollers should be. Adrian cleans off the roller cores (the metal rod the roller sits on), puts rubber on them, and then hand grinds them down to size. He will drill a hole on both sides of the roller core if needed so the roller can be put on the machine. I know from experience that some other roller makers won't do this for you if you want to switch from composition to rubber, so this saves on the expense of buying new roller cores!

Ramco does not have a website yet, but their phone number is in the right sidebar, and you can also e-mail Adrian at adrianramco[at]yahoo.com. Here are the prices that Adrian gave me as of today:

(by length, up to 1.5" in diameter)
0-6" $35
6-10" $45
10-20" $55
20-30" $65

1.5" - 2" diameter, add $10.

Tell them Tina sent you!

Sunday, September 2, 2007

My "New" Press!

Whew! What a day! In 100+ degree weather here in LA, with the help of good friends, we loaded (and then unloaded) the 400lb. press and the type cabinet full of type! Here are some pictures of the cabinet and the press in my new studio! I still have to put the press back together and fix up the press, but here are the first pictures! I'll post more pictures once I get the rest of the place cleaned up!


Posted by Picasa

Friday, August 31, 2007

A Pearl of a Press!


Photo taken from BriarPress.org


I am so excited! I have been scouring and annoying letterpress people and dealers up and down from here to the midwest looking for a Golding Pearl Improved for the whole summer. And just when I had given up and started trying to justify putting one of those large 1,000lb presses on the 4th floor of a residential building, one of the people I had contacted called and told me he had a Golding Pearl for me! It's a Golding Pearl Improved 7x11, like in the picture above, but without the the automatic inker on top and also without the treadle (foot pedal). It does have a cool homemade variable motor system, though! I'm excited to bring it home and get to work fixing it up!

Now it's questionable whether I will keep my tabletop Golding Official #4 or not. I haven't decided. I just spent a lot of time cleaning up and restoring the Golding Official, and, as you can see, it prints great. I know there are a lot of letterpress enthusiasts out there that would love to have a press like the Official, but at the same time, it's my first press and I do love it. But I'm unsure that I really need two presses. Oh what to do!
Related Posts with Thumbnails